post categories
Our Address
School of the World
300 M Este 50 N De La Pops, Escuela del Mundo, Playa Jaco Costa RicaOffice (outside Costa Rica) +506.2643.2462
Office (Costa Rica)
2643.2462
The powerful but small GoPro Point-Of-View cameras have become a common site amongst adventure seekers and travelers alike. In addition to having started the first year round GoPro vacation school in Costa Rica, I also do a lot of filming around the world and my GoPro camera kit has become a staple part of my shooting arsenal. Below is a highlight reel of some of the GoPro footage from projects I shot or directed in the first half of 2014, and my list of essential GoPro accessories that I travel with to get a wide variety of shots.
2014 GoPro Projects Highlight Reel from ZplusN on Vimeo.
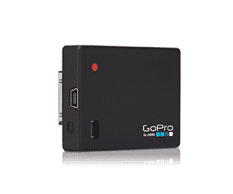
1. Battery Bac-Pac Battery power and memory are the first two things to think about before hitting the road to shoot in the field. I carry a couple of regular back up batteries and memory cards as well as the battery BacPac from GoPro. The BacPac is ideal for long time lapse shooting, as it doubles your battery life.
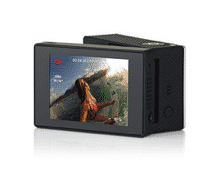
2. LCD Touchscreen BacPac The LCD screen is a big help in a few situations- quickly adjusting your camera settings, reviewing clips on the fly, and shooting on the move (like when you are walking with the steadicam) for example. The downside is that you burn more battery when it is on. Another bonus to the LCD screen is that it has a mic outlet so you can plug in an external microphone.
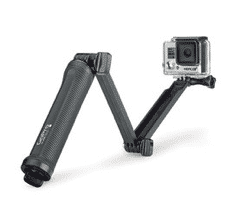
3. The 3 Way This is the only accessory on the list that I don’t currently own… yet. It is a new accessory from GoPro and works as a camera grip, extension arm, and tripod. A great multipurpose tool for your travel kit.
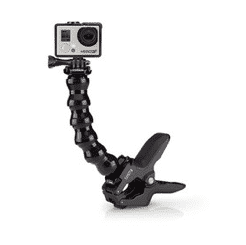
4. Jaws Flex clamp I love this mount. I’ve clipped it on to everything from boat railings to long aluminum extension poles (those ones that you use to clean a swimming pool). The flexible extension is stiff enough to hold the camera steady in a strong wind but flexible enough to reposition easily. Before this accessory came out I had a homemade version using the clamps that photo assistants use on set with gaffer’s tape and a sticky mount. GoPro’s official version has the added bonus of not rusting like my original homemade version was prone to do in salty seaside conditions.
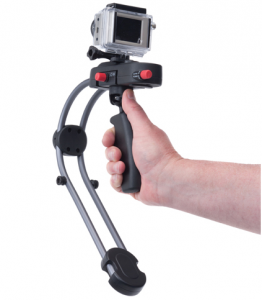
5. Steadicam I use this a lot, but it definitely takes some practice to get used to. Not only can you get follow shots and walking shots, but this gadget also eliminated the need for any type of glider or slider. One little trick to getting smooth floaty shots is to shoot in 60 fps and then slow it down in post.
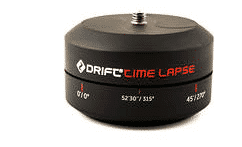
6. Panoramic Pan Timer (egg timer) The first panning timer that I had was a simple egg timer that I put a sticky mount on top of. Homeland security tends to frown upon timers ticking away accidentally inside a pelican case in the security line at the airport, and I haven’t had that happen since I upgraded to this guy. Another benefit is that it has built in mounts so that you can screw it onto a tripod as well as be able to use it for a heavier DSLR camera if you are shooting with more than just your GoPro.
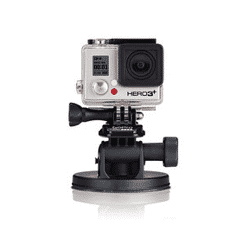
7. Suction Cup mount This mount is my favorite for motorcycle and car driving scenic shots. Make sure you have a clean surface (works best on smooth surfaces like the gas tank of a motorcycle or the windshield of a car) and I always tie a tether cord to it just in case it should come lose at 65 mph. You can add extensions but keep in mind the speed you are shooting at because you want minimal wind resistance to avoid camera shake.
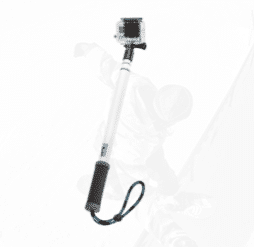
8. Aluminum Extension GoPole I made my first pole out of pvc, a GoPro bar mount, tennis racket grip tape, parachute cord, and a velcro watchband. It was a nice upgrade to get the aluminum “Reach” pole from GoPole. I used this for all of the underwater footage of the dolphins and following the shark and fish on the reef in the Bahamas. Because of the extreme wide angle of the GoPro camera you really have to be close to wildlife underwater to get the shot, so having that extra few feet of extension really helps. Again, shooting in a higher frame rate (I shot in 60fps) underwater and then slowing it down in post helps with making the footage look steady.
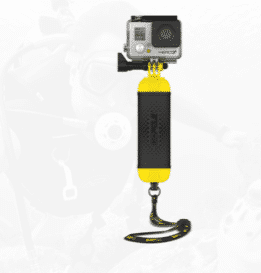
9. Floats (Floaty back, Bobber) There are a few different options for not losing your camera when shooting in the ocean. The first is GoPro’s orange sticky float back, which we use all the time at School of the World when we are mounting cameras on surfboards. When you are switching from land shooting to ocean shooting it is also easy to confirm you have switched to the waterproof backdoor on the housing when it has a huge orange float on it! GoPole also makes a great attachment called the Bobber, which serves as a handle as well as a float for the camera and housing.
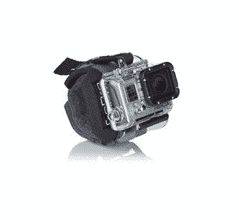
10. Wrist housing You see this in the video a couple of times. Lauren got a great shot of Dan and herself surfing using this accessory while we were filming for their music video. You can also see that I am wearing one while I was feeding the stingrays in the Bahamas. When I am filming underwater I usually have one GoPro on an extension pole and another on my wrist as my backup, or so that I can shoot video with one and easily switch to the second camera which I’ll already have set up specifically for taking photos. I’ve found that when shooting underwater it is easier to get all of your camera settings sorted out before you are in the water, which is why it is nice to have two cameras ready to go when the moment arrives. Sometimes you only get one chance to get the hero shot.
to reach our office directly +506.2643.2462
to reach a guest +506.2643.1064
U.S. number that connects to our office
 +1-305-517-7689
schooloftheworld (skype)
to reach our office directly
+506.2643.2462
to reach a guest +506.2643.1064
U.S. number that connects to our office +1-305-517-7689
schooloftheworld (skype)